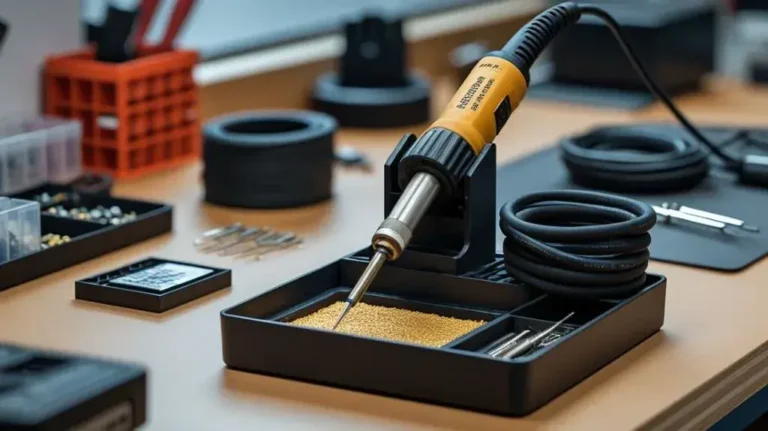

Why Is My Soldering Iron Not Melting Solder: Easy Fixes
You plug in your soldering iron, wait for it to warm up, and press the solder wire to the tip only for nothing to happen. Instead of liquefying instantly, the solder remains solid, turns into a sticky paste, or rolls off the tip in useless balls.
This is one of the most frustrating experiences in electronics repair and DIY crafting, but it is also one of the most common. Fortunately, the root cause is usually easy to diagnose and fix once you understand how heat transfer works during the soldering process.
Why Is My Soldering Iron Not Melting Solder? The Quick Answer
A soldering iron fails to melt solder primarily due to tip oxidation, which creates a dark, crusty barrier of metal oxides that blocks heat from transferring to the solder. Other common causes include setting the iron’s temperature too low, using a low-wattage iron that cannot maintain heat, trying to solder a joint with too much thermal mass, or using high-melting-point lead-free solder on an underpowered iron.
To resolve this issue, you must first determine whether the iron itself is failing to get hot, or if the heat is simply trapped inside the tip because of oxidation or poor contact.
Primary Causes and How to Fix Them
To fix the problem, you need to systematically rule out the most common culprits. Below are the five main reasons your soldering iron is not melting solder, along with practical steps to resolve each issue.
1. An Oxidized Soldering Tip (The Heat Barrier)
If your soldering iron is hot to the touch but the solder refuses to melt when touching the tip, oxidation is almost certainly the cause.
When the copper or iron plating of a soldering tip is exposed to oxygen at high temperatures, it forms a layer of metal oxide. This oxide layer acts as an insulator, preventing heat from escaping the tip. An oxidized tip looks dull, dark grey, or black, whereas a healthy tip is bright and silver.
- How to check: Look at the tip. If it is black or dark grey and solder will not cling to it, it is heavily oxidized.
- The Fix: Clean and tin the tip. Rub the hot tip against a brass wire sponge to scrape away the oxide layer. Immediately apply fresh solder to the tip to “tin” it, creating a protective silver layer that facilitates heat transfer. For severe oxidation, use a commercial tip tinner compound.
2. Insufficient Temperature or Low Wattage
Different solder alloys melt at different temperatures. If your iron is not set to a high enough temperature, or if it lacks the wattage to maintain its heat, it will struggle to melt the solder wire.
- Leaded Solder (typically 60/40 or 63/37): Melts at approximately 183°C (361°F).
- Lead-Free Solder (typically Tin/Copper/Silver blends): Melts at a much higher temperature, usually between 217°C and 227°C (422°F to 440°F).
If you are using a cheap, unregulated 15-watt or 25-watt pencil iron, it may not generate enough sustained heat to melt lead-free solder, which has become the standard in modern electronics.
- How to check: Verify the type of solder you are using. If it is lead-free, a basic, non-adjustable iron may simply be underpowered.
- The Fix: If you have an adjustable temperature station, set the heat to roughly 320°C to 350°C (608°F to 662°F) for leaded solder, or 350°C to 400°C (662°F to 752°F) for lead-free solder. If your iron is non-adjustable and rated under 40W, consider switching to a 40W to 60W iron or upgrading to a temperature-controlled soldering station.
3. Too Much Thermal Mass in the Joint
Your soldering iron might melt solder easily when the wire is touched directly to the tip in mid-air, but fail completely the moment you touch the iron to a component on a circuit board.
This happens because of thermal mass. When you touch a metal component, a thick wire, or a large ground plane on a circuit board, that metal acts as a heat sink. It rapidly draws heat away from the soldering iron tip faster than the iron can replenish it, causing the tip temperature to drop below the melting point of the solder.
- How to check: Does the iron melt solder when tested in isolation, but fail when touched to the actual workpiece? If yes, the workpiece has too much thermal mass for your current setup.
- The Fix: Use a wider, chisel-style tip instead of a fine, pointed conical tip. A larger tip holds more thermal energy and transfers it much faster. Additionally, preheat the board slightly if possible, or use an iron with better thermal recovery (often found in cartridge-style active tips).
4. Incorrect or Low-Quality Solder
Not all solder is created equal. If you accidentally purchased plumbing solder, silver solder designed for jewelry, or heavy-duty structural solder, your electronics soldering iron will not be able to melt it. These industrial solders have incredibly high melting points and require a propane torch rather than a soldering iron.
Furthermore, low-quality solder without an integrated rosin flux core will not flow or melt smoothly. Flux is a chemical cleaning agent that removes surface oxidation during the soldering process, allowing the solder to wet and flow.
- How to check: Look at the label on your solder spool. It should explicitly state “Rosin Core” or “Acid Core” (never use acid core for electronics) and list the alloy composition (e.g., 60/40 Sn/Pb or SAC305).
- The Fix: Purchase high-quality, rosin-core electronics solder. For beginners, a 60/40 leaded rosin-core solder (0.8mm or 1.0mm diameter) is the easiest to melt and work with, provided you work in a well-ventilated area.
5. Damaged or Failing Heating Element
If the soldering iron remains completely cold to the touch even after being plugged in for several minutes, the internal heating element is likely broken.
In budget soldering irons, the nichrome wire heating element can burn out over time. In modern soldering stations, the ceramic heating element can crack if the iron is dropped or subjected to thermal shock (such as being plunged into a soaking wet sponge).
- How to check: If the handle of the iron feels slightly warm but the metal shaft and tip remain completely cold, the heating element or the connection to it has failed. If you have a multimeter, you can unplug the iron and test the resistance across the heating element terminals; an open circuit (infinite resistance) indicates a dead element.
- The Fix: Replace the heating element if your iron supports replaceable parts, or replace the entire soldering iron handle.

Troubleshooting Guide: Quick Diagnostic Table
| Symptom | Likely Cause | Immediate Action |
|---|---|---|
| Tip is black; solder rolls off like water. | Tip Oxidation | Clean with brass wool, use tip tinner, and apply fresh solder. |
| Iron is warm but cannot melt any solder. | Low Temperature or Wattage | Turn up the heat (aim for 350°C/662°F) or upgrade to a higher-wattage iron. |
| Solder melts in the air but solidifies on the board. | High Thermal Mass of Joint | Switch to a larger chisel tip to increase heat transfer surface area. |
| Solder requires extreme heat to melt. | Industrial / Plumbing Solder | Replace with rosin-core electronics solder (60/40 or lead-free SAC305). |
| The tip remains completely cold to the touch. | Dead Heating Element / No Power | Check the outlet, check the fuse, or replace the heating element. |
How to Clean and Restore an Oxidized Soldering Tip
If your iron is hot but the tip is black and refusing to melt solder, you can usually restore it using this step-by-step rejuvenation process.
Step 1: Heat the Iron to Working Temperature
Plug in your iron and set it to roughly 300°C (572°F). Do not set it to maximum heat, as excessive heat will only accelerate oxidation during the cleaning process.
Step 2: Mechanical Cleaning
Plunge the hot tip repeatedly into a brass wire sponge. The brass ribbon is softer than the iron plating of the tip, so it will scrape away the black carbon and oxide crust without scratching the underlying metal.
Avoid using sandpaper, files, or steel wool, as these aggressive abrasives will strip away the protective iron plating of the tip, permanently ruining it.
Step 3: Apply Tip Tinner (If Needed)
If the brass wire does not fully clean the tip, dip the hot tip into a container of commercial tip tinner (a mixture of solder powder and active flux). Leave it in the powder for two to three seconds. You will see some smoke as the flux chemically eats away the stubborn oxides, leaving a bright silver coating of solder on the tip.
Step 4: Wipe and Re-Tin
Wipe the tip once more in the brass wool to remove any excess tinner residue, then immediately apply a generous amount of standard rosin-core solder to the tip. This creates a fresh, protective layer of molten solder that prevents oxygen from reaching the tip plating.
Crucial Safety and Maintenance Practices
To prevent your soldering iron from losing its ability to melt solder in the future, adopt these simple maintenance habits:
- Never leave the iron on while idle: If you step away from your workbench for more than a few minutes, turn the iron off or lower the temperature. Leaving a hot iron resting in its stand accelerates oxidation rapidly.
- Always tin the tip before storage: Before turning off your soldering iron, coat the entire working surface of the tip with a fresh layer of solder. This “storage coat” acts as a physical barrier against oxygen while the iron cools down.
- Ditch the wet wet-sponge habit: Traditional yellow kitchen sponges shock the hot metal tip when they are soaked in water. This sudden temperature drop can micro-crack ceramic heating elements and strip the iron plating off the tip. Use a brass wire sponge instead. If you must use a damp cellulose sponge, ensure it is barely moist, not dripping wet.
Frequently Asked Questions
What temperature should my soldering iron be set to melt solder?
For standard 60/40 leaded solder, set your iron between 320°C and 350°C (608°F to 662°F). For lead-free solder, set the temperature slightly higher, between 350°C and 380°C (662°F to 716°F). Avoid exceeding 400°C (752°F) for general electronics work, as extreme heat burns away flux too quickly and accelerates oxidation.
Why does my solder ball up and roll off the tip?
This is a classic symptom of tip oxidation or a lack of flux. When a tip is oxidized, the molten solder cannot “wet” the surface, meaning it cannot stick to the metal. Instead, surface tension causes the solder to form a ball and roll off. Cleaning and tinning the tip will resolve this.
Can I use sandpaper to clean my soldering iron tip?
No. Modern soldering iron tips consist of a copper core plated with iron, nickel, and chrome. Sanding or filing the tip scratches through these thin plating layers, exposing the copper core directly to the solder. The solder will then rapidly dissolve the copper, destroying the tip’s shape and heat retention properties within a few hours of use.
How do I know if my soldering iron heating element is broken?
If the iron is plugged into a working outlet, turned on, and the indicator lights function, but the tip remains completely cold to the touch after three to five minutes, the heating element is likely broken or disconnected internally.
Conclusion About Why Is My Soldering Iron Not Melting Solder
When a soldering iron refuses to melt solder, the issue is rarely a complete mystery. In nine out of ten cases, the culprit is either a dark layer of tip oxidation blocking heat transfer, or an underpowered iron struggling to cope with the high melting point of lead-free solder.
By keeping your soldering tip clean, shiny, and coated in a fresh layer of silver solder, you ensure optimal thermal transfer. Always match your iron’s temperature to the specific alloy you are melting, use brass wool instead of wet sponges, and never leave your iron cooking on the stand while idle. Taking these simple steps will keep your soldering iron running hot and melting solder smoothly for years to come.

Scott Yarnell is a tool expert focused on practical guides, product research, and real-world tool performance to help readers make informed decisions.